Overview
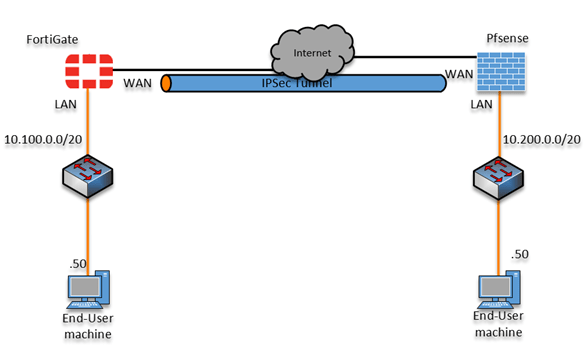
Today we will be going over how to create a Site to Site VPN between a Fortigate Appliance and a PFSense Firewall. Below is a overview of the Topology we are got to be using
Fortigate
VPN Tunnel
- Login to your Fortigate Appliance
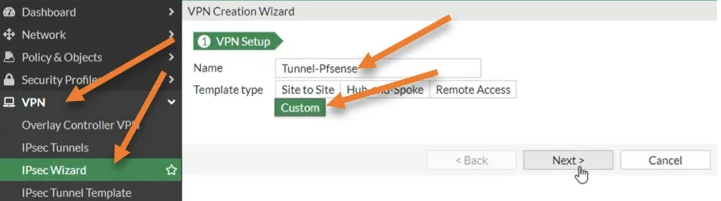
- Under VPN > IPSec Wizard
Name the Tunnel your prefered name and select Custom
-
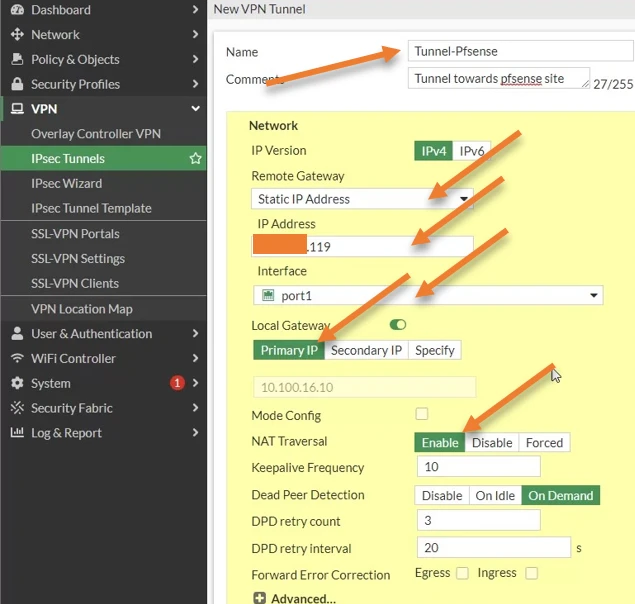
Configure the VPN Tunnel settings
a) Set the Remove Gateway to the WAN IP of your PFSense Firewall
b) Set the Interface to your WAN interface
c) Enable NAT Traversal
-
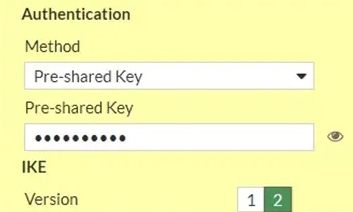
Configure Authentication
a) Set the Authentication Method to Pre-shared Key
b) Enter a Pre-shared Key
c) Select IKE version 2
-
Configure Phase 1 Proposal
a) Encryption: AES128
b) Authentication: SHA256
c) Diffie-Hellman Group: 14
d) Key Lifetime: 28800

-
Configure Phase2 Configuration
a) Configure the Phase2 Name
b) Configure the Local Address
c) Configure the Remove Address

-
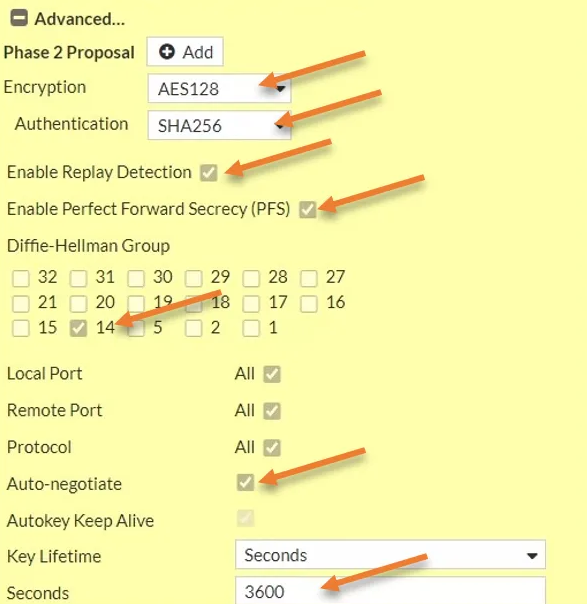
Configure the Phase2 Proposal
a) Encryption: AEC128
b) Authentication: SHA2556
c) Enable Replay Detection
d) Enable Pefect Forward Secrecy (PFS)
e) Diffie-Hellman Group: 14
f) Enable Auto-negotiate
g) Seconds: 3600
Security Policy
-
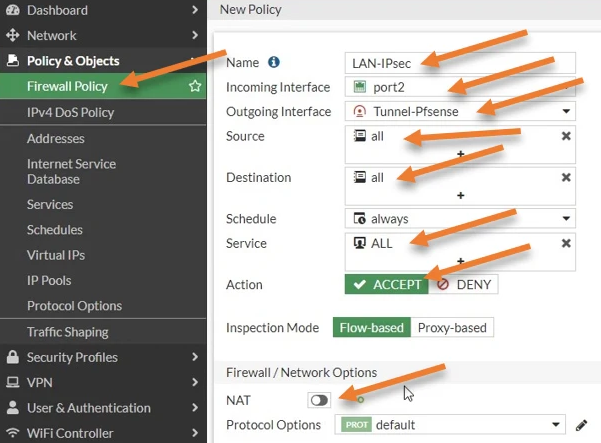
Configure a Policy to allow traffic from LAN to our IPSec Tunnel
a) Incoming Interface: LAN Network Interface
b) Outgoing Interface: Our IPSec Tunnel
C) Source: All
d) Destination: All
e) Services: All
f) Action: ACCEPT
g) Disable NAT
-
Configure a policyt to allow traffic coming from our IPSec tunnel to our LAN
NOTE: This must be a seporate policy and cannot be combined with our first Policy
a) Incoming Interface: our IPSec Tunnel
b) Outgoing Interface: Our LAN Network Interface
C) Source: All
d) Destination: All
e) Services: All
f) Action: ACCEPT
g) Disable NAT


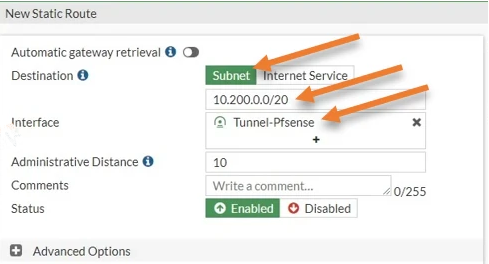
Static Route
- Navigate to Network > Routing > Static Routes > Create New
PFSense
VPN Tunnel
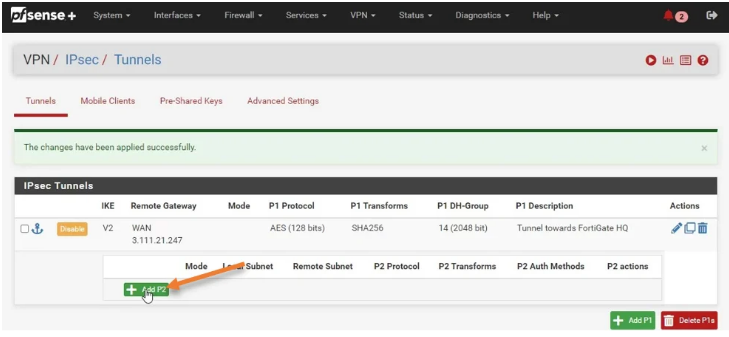
- Log into PFSense and naviagte to VPN > IPSec
- Select Add P1
-
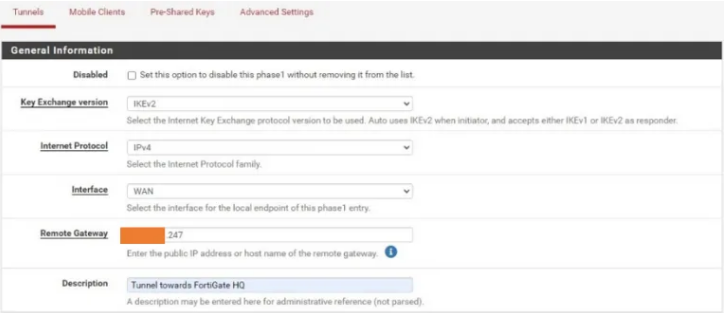
Configure the Phase 1 Configuration
a) Set Interface to WAN
b) Set Remote Gateway to the WAN IP of your Fortigate Appliance
-
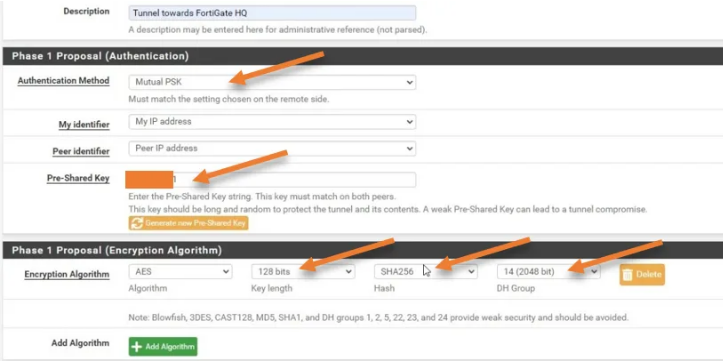
Configure Phase 1 Authentication
a) Authentication Method: Mutual PSK
b) Enter the Pre-Shared key you created in Fortigate
c) Confgigure the Encryption Algorithm as follows
- Key Length: 128 bit
- Hash: SHA256
- DH Group: 14 (2048 bit)
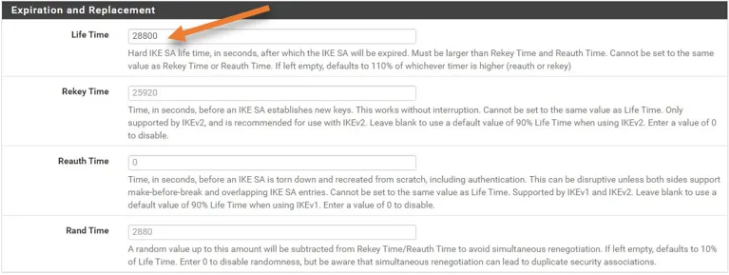
- Configure the Life Time
- Add a P2
-
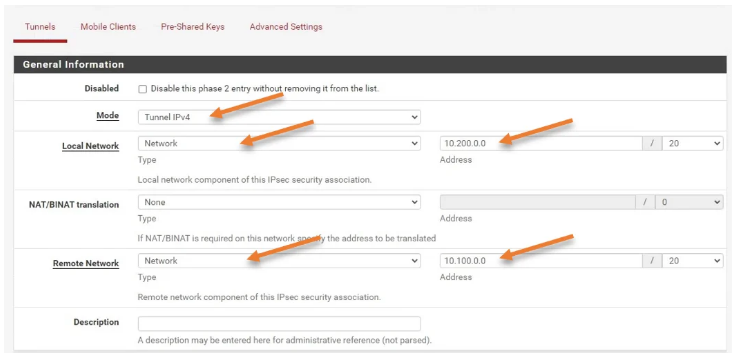
Configure the P2 Network Configuration
a) Mode: Tunnel IPv4
b) Local Network: Configured to your LAN Network for this firewall
C) Remote Network: Configure the LAN Network for your Fortigate Firewall
-
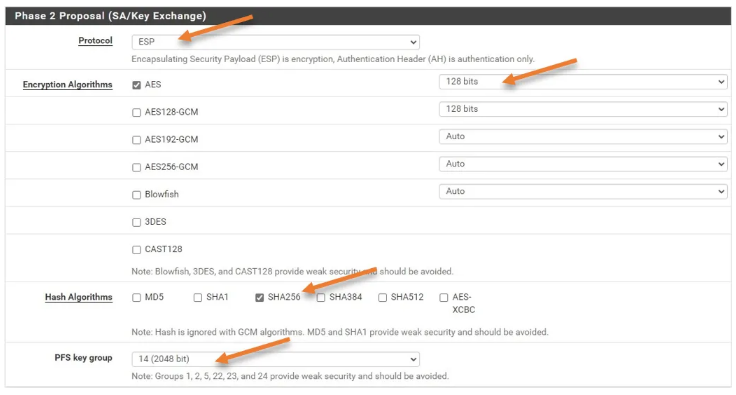
Configure the Phase 2 Proposal
a) Encryption Algorithms: AES 128 bits b) Hash Algorithms: SHA256 c) PFS Key Group: 14 (2048bit)
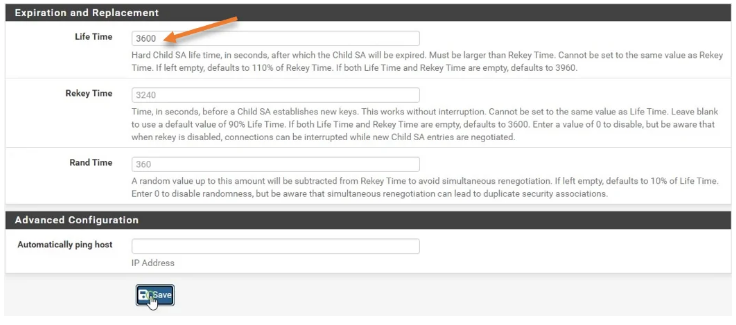
- Configure Life Time
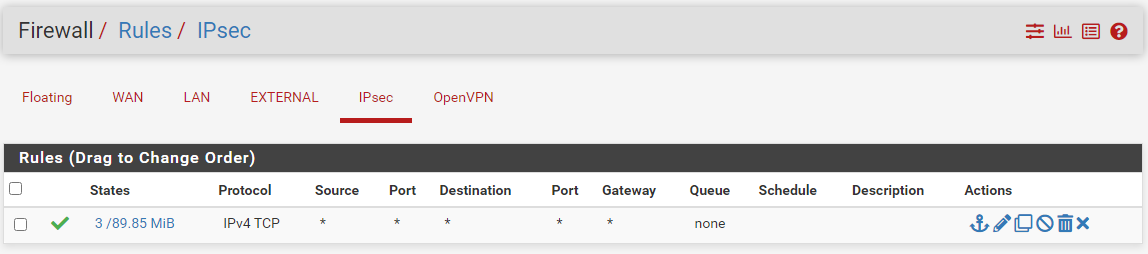
Security Policy
If you would like to be able to access everything behind the PFSense Firewall. you will need to create a Default allow any any rule
Static Route
There is No Static Routes Required on the PFSense Firewall