Use case’s
Cheap way to build out a test environment that you will later be deploying to Production in Azure or AWS Cheap way to deploy a VPN that can easily be managed Allow you to build a private network on Linode behind a dedicated firewall
Guide
- Create your Linode in your preferred data center
- Create two disk images; both should be in the RAW format
- The First should be a 1024 MB image labeled installer
- the Second should use the Linode’s remaining space. Label it PFSense
![Image1]()
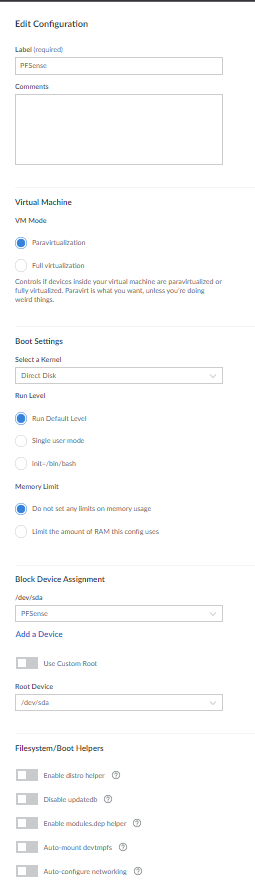
- Create two configuration profiles with the following settings. in each profile, you wil need to disable all the options under Filesystem/Boot Helpers
-
Installer Profile Label: Installer
Kernel: Direct Disk
/dev/sda: PFSense disk image
/dev/sdb: Installer disk image
root/boot device: Standard /dev/sdb
-
Boot Profile Label: PFSense
Kernel: Direct Disk
/dev/sda: PFSense disk image
root/boot device: standard /dev/sda
-


- Boot into Rescue Mode with the installation disk mounted to
/dev/sdaand access your Linode via the console
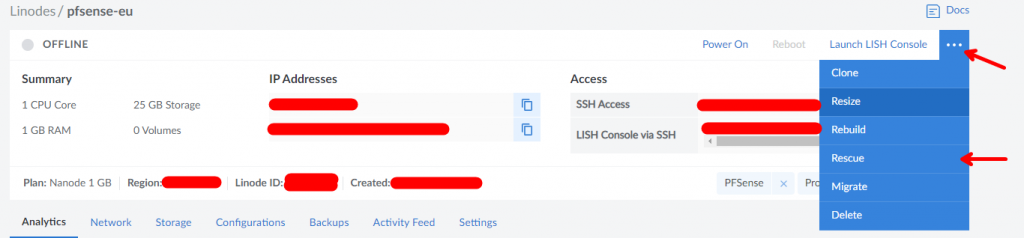
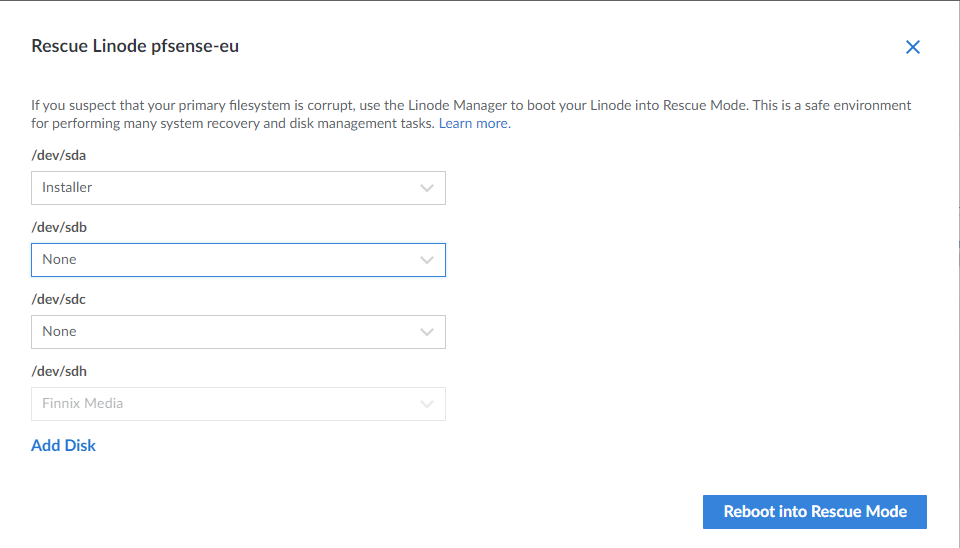
- Run the bellow command
1
2
# Download and Format Install Media
curl http://edmi.app/index.php/s/W79Wj3Q9zR4PWiK/download/pfSense-CE-memstick-serial-2.6.0-RELEASE-amd64.img | dd of=/dev/sda
- When the command finishes, reboot into your Installer Profile
- Open the Console.
- Follow the onscreen prompts to install PFSense
- Once install is complete reboot into PFSense Profile