Introduction
This Post will go over a easy way to replace cloud based storage platforms such as Onedrive or Dropbox with your own self hosted solution.
Hardware Requirements for your Syncthing Server
you will need a device that can run Linux and has enough storage for your needs. For the purpose of this post I will be using a Raspberry Pi 3b running Ubuntu 20.04
A Couple Notes Before We begin
- Before beginning the server installation and configuration for Syncthing insure the storage you intend on using is configured to mount at boot
- The easiest and most universal way to insure this is done is to insure they are in your fstab
-
It is recommended that whenever setting up a home server that you have it set up with a static IP address
- While there is a Windows Version of Syncthing this post will be solely focused on the Linux versions
Server Installation
-
Run the following commands to add the PGP key and apt repository:
1
2
3
 sudo curl -s https://syncthing.net/release-key.txt | sudo apt-key add -

 echo "deb https://apt.syncthing.net/ syncthing stable" | sudo tee /etc/apt/sources.list.d/syncthing.list
-
Run the following command to update the cached list of available packages and install Syncthing:
1 2 3
sudo apt update sudo apt install syncthing -
Run the bellow command, when it completes press ctl+c:
1
 syncthing
-
Run the bellow command to open the configuration file:
1
 sudo nano ~/.config/syncthing/config.xml
-
Locate where it says ` <address>127.0.0.1:8384 ` and change it to read ` <address>Static IP of Server:8384`
Before Change
![configexample1]()
After Change
![configexample2]()
-
run the bellow command and then navigate to
Ip of server:8384in your web browser of choice1
syncthing
-
See the Server configuration in the Web Browser Configuration section for further configuration steps


Client Installation
-
Run the following commands to add the PGP key and add the apt repository:
1 2 3
curl -s https://syncthing.net/release-key.txt | sudo apt-key add - echo "deb https://apt.syncthing.net/ syncthing stable" | sudo tee /etc/apt/sources.list.d/syncthing.list
-
Run the following command to update the cached list of available packages and install Syncthing:
1 2 3
sudo apt update sudo apt install syncthing -
Run the bellow command:
1
 syncthing
-
Open you web browser of choice and navigate to
127.0.0.1:8384 -
See the Client configuration in the Web Browser Configuration section for further configuration steps
Web Browser Configuration
Server
Note: The following steps assume that the data that you wish to share with all your clients is already on your server
Adding a shared Folder
- Select Add Folder. This is the folder on the server that you would like to share with all your clients
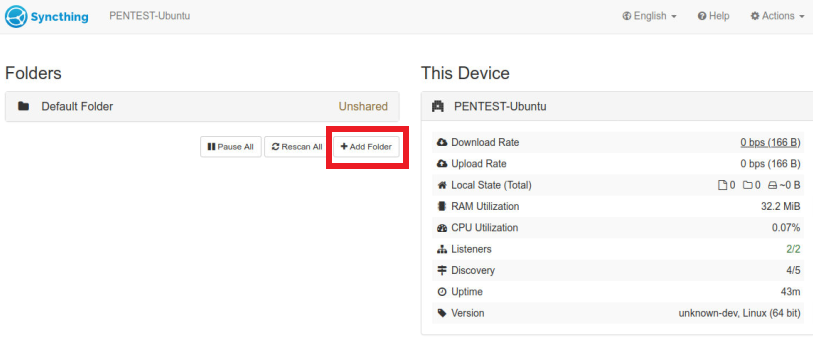
- Name the folder something easy to remember and makes sense for the share such as Personal DropBox.
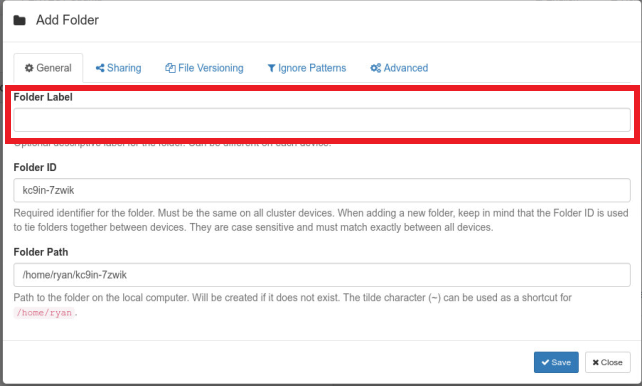
- Set the Folder Path to the directory of where the files you want to share are stored locally on the server

-
Select Save
-
You are done with the configuration of the new shared folder until you have added the remote devices to share the folder with (See Adding Remote Devices section for further detail)
-
Once you have added your remote devices click on the folder you created earlier and select edit
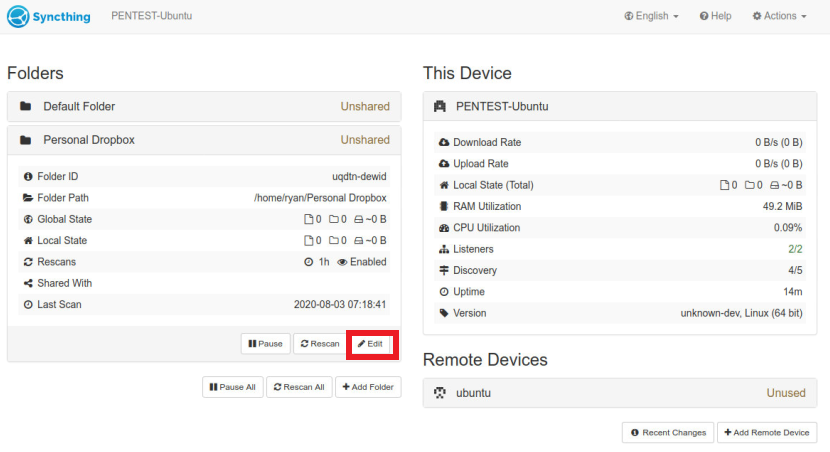
- Select the tab labeled Sharing
![webconfig5]:(/assets/2020/OneDriveReplacement/webconfig5.png)
- Select all the devices you want to have access to your files
![webconfig6]:(/assets/2020/OneDriveReplacement/webconfig6.png)
-
Click save
-
Within the next 2 Min you will be prompt to confirm the shared folder on your remote device.
Adding Client Devices
- On your Clients Syncthing page select actions
![remotedevice1]:(/assets/2020/OneDriveReplacement/remotedevice1.png)
- Select Show ID. Remember this ID you will need it in a minute
![remotedevice2]:(/assets/2020/OneDriveReplacement/remotedevice2.png)
Example ID:
![remotedevice4]:(/assets/2020/OneDriveReplacement/remotedevice3.png)
- On your Syncthing’s Server Syncthing page Select Add Remote Device
![remotedevice3]:(/assets/2020/OneDriveReplacement/remotedevice5.png)
- Enter that ID you copied from your Client into the Device ID felid. you can leave the Device Name empty it will auto update with the hostname of your client when it connects for the first time
![remotedevice5]:(/assets/2020/OneDriveReplacement/remotedevice6.png)
-
Click Save
-
Within the next 2 Min you will be prompt on your CLient to confirm that you added the it to the Syncthing Server.
![deviceconfirmation]:(/assets/2020/OneDriveReplacement/deviceconfirmation.png)
Client
Client Configuration for adding a Shared Folder
Note: The following steps are assuming you have already shared the folder on the server
- Open
127.0.0.1:8384in your web browser of choice - Select add
![addsharedfolder1]:(/assets/2020/OneDriveReplacement/addsharedfolder1.png)
- Insure the Folder Label is to your satisfaction
![addsharedfolder2]:(/assets/2020/OneDriveReplacement/addsharedfolder2.png)
- Select where you want to save the local copy of the shared folder
![addsharedfolder3]:(/assets/2020/OneDriveReplacement/addsharedfolder3.png)
- Select Save
![addsharedfolder4]:(/assets/2020/OneDriveReplacement/addsharedfolder4.png)
How to make Syncthing Start automatically at boot
Right now you have to manually start Syncthing on both your Clients and your Server every time you want to use it. Run the bellow command to enable Syncthing to run at boot.
1
    systemctl enable syncthing@$USER